Konichiwa Yujin,
Sorry for not posting for so long, I been to Japan for a work trip. While Japan is amazing, the state of the ESXi in the office wasn’t so great. The ESXi crushed, and after investigation, we notice that he had no free space on HDD’s, which was weird. we have 100TB, and only 4 VM’s. the first suspect? Snapshots!

Japanese Garden building
Snapshots are great, but they can be your worst enemy if you don’t use them correctly. The “issue” with snapshots is that they save your delta’s. This means that every change happening on the VM is “recorded” on the snapshot, “another change to revert”. As the time pass, the snapshot will grow and grow with the limit set to your free space on HDD’s.
It easy to set up a snapshot, but it hard to track them, especially when you have a big environment and many “hands” on the system. but we have an easy solution, PowerShell. We can create a report, that give us all the information needed to manage the snapshots, so let get started!
Prerequisites
Before we can start, please make sure you have the following:
- Access to the VCenter or ESXi (I encourage to create a service account with relevant permissions)
- A server or PC with PowerCLI installed.
Step 1 – Install PowerCLI
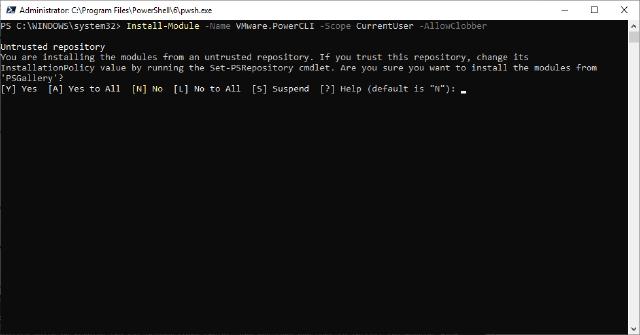
Installing PowerCLI is easy, we can get it directly from the PowerShell Gallery:
Install-Module -Name VMware.PowerCLI -Scope CurrentUser

Terminal Window with PowerCLI installation
Step 2 – Connect to the VCenter or ESXi
Before we can run any command in PowerCLI, we need to connect the VCenter or ESXi. To do so we need to use the Connect-VIServer cmdlet:
Connect-VIServer -Server myvc01 -User 'Username' -Password 'Password'
If you have any issue with the certificate, you will get a notice now. it will be in yellow which state warning and not an error. I advise you to fix it, but it’s not necessary for our cause.
A little tip, keeping the password in plain text in scripts is not so safe, so it’s better to secure it a little bit. I don’t like this method either, but this is much safer. First, we will convert the password to secure string, and save it to a file (I recommend changing the ACL for the file also).
$PasswordFile = "<Path>\PasswordFile.txt"Read-Host -AsSecureString | ConvertFrom-SecureString | Out-File $CredsFile
Now we can connect to the VCenter or ESXi more secure:
$PasswordFile = "<Path>\PasswordFile.txt"$securePassword = Get-Content
$PasswordFile | ConvertTo-SecureString$credentials = New-Object System.Management.Automation.PSCredential ("Username", $securePassword)Connect-VIServer -Server myvc01 -Credential $credentials
Please, do yourself a favor and use this method in your script.
Step 3 – Get all the Snapshots
Snapshots are unique to a specific VM, so first we need to get all the VM’s on the Vcenter or ESXi, to do it we will use the Get-VM cmdlet, then for each VM we will get the snapshots, we will use the Get-Snapshot cmdlet.
$Snapshots = Get-VM | Get-Snapshot | select Description,Created,VM,SizeMB,SizeGB
I only took the properties that I needed.
Step 4 – Process the Data
Now, I’ll be honest with you, you can pipe this to Format-List and you will have a great report to start with. But I always love to make my reports better looking. So, there are a few things we need to process first.
Snapshot Size
I will create a simple function that will process the snapshot size (this why I took both SizeMB and SizeGB) and return a nice value.
function Get-SnapshotSize ($Snapshot) {
    if ($snapshot.SizeGB -ge "1") {
        $Snapshotsize = [string]([math]::Round($snapshot.SizeGB, 3)) + " GB"
    }
    else {
        $Snapshotsize = [string]([math]::Round($snapshot.SizeMB, 3)) + " MB"
    }
    Return $Snapshotsize
}
Snapshot Created Date
I also want to add some colors to my reports, Convertto-HTML cmdlet doesn’t support conditional formation, so I will process the Created date to style it manually, I decided that snapshots not older than 1 week will be green, snapshots between 1 to 2 weeks will be yellow, and snapshots older than 2 weeks will be red.
function set-SnapshotDate ($snapshot)
{
    $greenValue = (get-date).AddDays(-7)
    $RedValue = (get-date).AddDays(-14)

    if ($snapshot.created -gt $greenValue)
        {
            $backgroundcolor = "green"
        }
    elseif ($snapshot.Created -lt $greenValue -and $snapshot.Created -gt $RedValue)
        {
            $backgroundcolor = "yellow"
        }
    else
        {
        $backgroundcolor = "red"
        }
    return $backgroundcolor
}
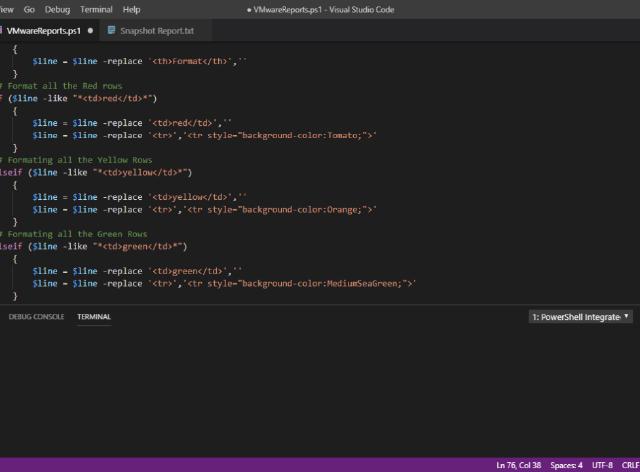
Then, I created another function that will get the HTML data and change the style.
function Format-HTMLBody ($body)
{
    $newbody = @()
    foreach ($line in $body)
    {
        ## Remove the Format Header
        if ($line -like "*<th>Format</th>*")
            {
                $line = $line -replace '<th>Format</th>',''
            }
        ## Format all the Red rows
        if ($line -like "*<td>red</td>*")
            {
                $line = $line -replace '<td>red</td>',''
                $line = $line -replace '<tr>','<tr style="background-color:Tomato;">'
            }
        ## Formating all the Yellow Rows
        elseif ($line -like "*<td>yellow</td>*")
            {
                $line = $line -replace '<td>yellow</td>',''
                $line = $line -replace '<tr>','<tr style="background-color:Orange;">'
            }
        ## Formating all the Green Rows
        elseif ($line -like "*<td>green</td>*")
            {
                $line = $line -replace '<td>green</td>',''
                $line = $line -replace '<tr>','<tr style="background-color:MediumSeaGreen;">'
            }
        ## Building the new HTML file
            $newbody += $line
    }
    return $newbody
}
This is ungentle solution, if you have a better idea, I would love to here!
Step 3 – Create the Snapshots Report
Now that we have all the data we need, we can create the report. We will create an HTML report, so it will be easy to use it in different scenarios.
Header and Style
First, we will handle the HTML header and set basic style to our page.
$date = (get-date -Format d/M/yyyy)
$header =@"
 <Title>Snapshot Report - $date</Title>
<style>
body {   font-family: 'Helvetica Neue', Helvetica, Arial;
         font-size: 14px;
         line-height: 20px;
         font-weight: 400;
         color: black;
    }
table{
  margin: 0 0 40px 0;
  width: 100%;
  box-shadow: 0 1px 3px rgba(0,0,0,0.2);
  display: table;
  border-collapse: collapse;
  border: 1px solid black;
}
th {
    font-weight: 900;
    color: #ffffff;
    background: black;
   }
td {
    border: 0px;
    border-bottom: 1px solid black
    }
</style>
"@
Create Title to Our Table
To add a title before our table:
$PreContent = "<H1> Snapshot Report for " + $date + "</H1>"
Convert to HTML
We did everything needed to create our report, now let’s wrap up everything.
$html = $Snapshots | Select-Object VM, Created, @{Label = "Size"; Expression = { Get-SnapshotSize($_) } }, Description, @{Label = "Format"; Expression = { set-SnapshotDate($_) } } | Sort-Object Created -Descending | ConvertTo-Html -Head $header -PreContent $PreContent
Format the HTML with Conditional Formatting
$Report = Format-HTMLBody ($html)
Step 4 – Publish the Snapshots Report
now that we have our report ready, we need to decide how to publish it. either by mail or as an HTML page, you choose.

Image of the report
Create HTML File
If you want to create an HTML file, just pipe your report to out-file
$report | out-file -Path <path>
Send Report Over Mail
To send the report over mail, we can use the Send-MailMessage cmdlet
$MailParam = @{
 To = "[email protected]"
 From = "[email protected]"
 SmtpServer = "10.0.0.4"
 Subject = "VMware Snapshot Report for " + (get-date -Format d/M/yyyy)
 body = ([string]$Report)
}
Send-MailMessage @MailParam -BodyAsHtml
Step 5 – Disconnect from Server
It’s very important to disconnect from the server when we finish. Two main reasons, one for security reasons, and two for session limit on VMWare, the limit is set to 100 concurrent sessions, both Idle and active sessions count. we can disconnect from the server with the Disconnect-VIServer
Disconnect-VIServer -Confirm:$false
Conclusion
Snapshots are great! but they can do harm! We learned how to generate snapshot reports, to see how old the snapshots are and how much storage they take. Decide the frequency you want to run this report, and set a scheduled task, but remember to be secure! I will also include the full script if you want, you can download it here
See you next time!

