With Powershell V7 on the verge, the importance of building solutions that are cross-platforms in Powershell is bigger. One of the issues we have while running tests, is that our Powershell environment is not “clean” as in other computers. That’s where Powershell Core in a container gets in the picture.
We install a lot of modules, software and other things that our target audience or servers won’t share. Our solution could act differently in those environments. We also risk not understanding the full dependencies list and limitation of a real environment. That’s why we need a pure Powershell environment.
While installing a new server, whether virtual or physical is a time-consuming task, running a clean Powershell core in a container can take us a few minutes or less.
What are containers anyway?
Until containers arrived, we used virtualization to virtualize Operations systems, but, sometimes we need only a small app (like Powershell? 😉) but we don’t want another operating system. We also don’t want to care about OS updates and other dependencies. That is why we “virtualize” apps. You can read more in The Docker site about what are containers.
Prerequisites
Before we can run containers, we need a containers engine. The most popular one is Docker, and in this guide, we will use Docker. The only downside is we can’t use Windows 10 home edition due to Hyper-V limitations.
Here are the prerequisites:
- Windows 10 64bit: Pro, Enterprise or Education (1607 Anniversary Update, Build 14393 or later).
- Virtualization is enabled in BIOS. Typically, virtualization is enabled by default. This is different from having Hyper-V enabled.
- CPU SLAT-capable feature.
- At least 4GB of RAM.
If you meet the prerequisites, go ahead and install the docker engine from docker .
Starting with containers
After installing the Docker engine, we need to pull the image from the Docker hub repository. Docker images contain apps and configuration made by other developers. Microsoft created an image with PowerShell Core .
Pull Docker Image
Begin with opening PowerShell. We use the Docker pull command to get the image we want:
docker pull mcr.microsoft.com/powershell:latest

PowerShell terminal running the Docker pull command
Starting a Powershell Core in a container
After pulling the image, we can create containers based on the image. To create a container we run the following command:
docker run --name ps-core -it mcr.microsoft.com/powershell:latest

PowerShell terminal running the Docker Run command
Congratulation! you now have a clean Powershell core in a container 😎
Aftermath
Finally, when we finish our tests, we need to decide what to do with the container. We want to keep it for future purpose? Or we don’t need it anymore and delete it?
Delete the container
If we decided we don’t need the container anymore, we can remove it easily. First, we need the container ID. We can get it with the command Docker ps.
docker ps -a
The default behavior for Docker ps command is to show only running containers. We add the -a switch to list both running and stopped containers. Copy the ID of the container, and pass it to the Docker rm command:
docker rm <Container ID>

PowerShell terminal running the Docker rm command
Keep the container
If we decided to keep the container, we can re-use it at any time. First, we need to make sure the container is running. We can use the docker ps -a command to verify it. If it’s not running, we can start it with the command Docker start.
docker start ps-core
Now in order to interact with it, we use the Docker attach command.
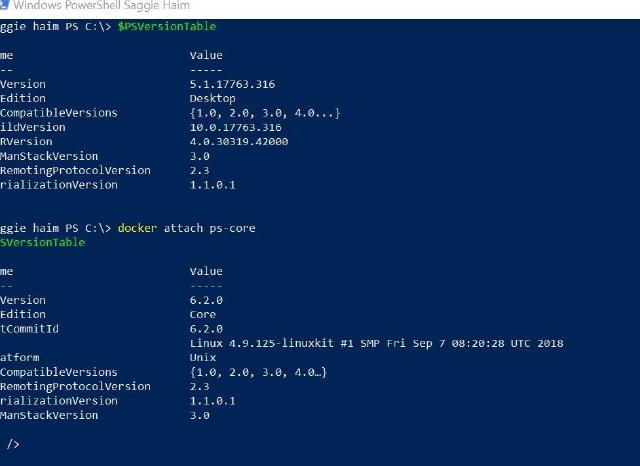
docker attach ps-core

PowerShell terminal running the Docker attach command
Conclusion
This is only the tip of the iceberg, and containers are a fascinating technology. There is so much to learn and so many things to do with it. But, this is my first step in this world, and hopefully for you too. After this guide, we can easily create a new PowerShell environment to test our cross-platforms solution and better understand the needed dependency for our modules.
Thanks for reading!

